How to create a storm shelter or tornado safe room
I wanted to summarize all the essential steps of the storm shelter to make it easy to follow. the storm shelter was part of a
full addition, so you will see some extra framing in the pictures. I hope you enjoy it!
01 Planning
The planning stage was done on the FEMA website. There is tons of information about the building requirements for the different types of safe rooms. You can find it
here.
02 Basement / Storm Shelter Walls
This is the only part that was not DIY because it takes lots of tools that I do not have. We had a basement poured for the storm shelter. It has 8-inch thick walls with steel and fiber reinforcement. The wall height is 8.5 feet so you have lots of headroom and the inside dimensions of the shelter are 7.7 ft X 13.7 ft. The size really depends on the number of people you plan to use it.


03 Seal Plate
After the basement was all dry it was time to put down the seal plate. Pressure-treated 2 X 8’s were used, and a foam seal was put under them to stop air drafts. The holes for all the anchor bolts had to be marked, drilled, and then bolted down with large fender washers and 1/2" nuts. All the surfaces on the foundation and basement must have seal plates before adding the floor/ceiling joists. You can see the finished product below.
04 Floor/Ceiling Joist
The floor/ceiling joists are framed with 2 X 8 douglas fur. The part over the storm shelter/basement was framed to the FEMA standard of 12" on center. The complete floor was screwed together with 3" construction screws for strength. You can see an opening framed on one side for the staircase going into the storm shelter. The joists were strapped down to the concrete walls as required in the FEMA standard.

05 Decking
The 3/4 inch tongue and grooved OSB subfloor decking was glued down to the joist with Liquid Nail adhesive and screwed down. Screw spacing was 6-8 inches apart with 1 3/4 inch screws and plastic was put on it to protect it until the roof was put on. With the sheeting running perpendicular to the joist for added strength it took 3 rows with 4 sheets each.


06 Walls
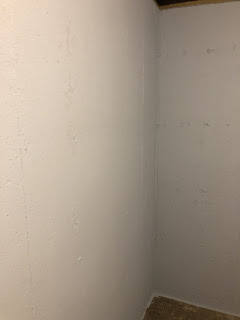
To help reduce the dampness of the storm shelter we decided to paint the walls with waterproof paint. A light blue color, called Bubble Bath, was used to help brighten up the room. The paint was rolled on the walls with a 3/4" nap roller to help it cover the rough surface. The paint is Zinsser® WaterTite® LX Ultra Concrete & Masonry Waterproofing Paint if you are interested in it, and it is easy to work with because it cleans up with water.
07 Steps
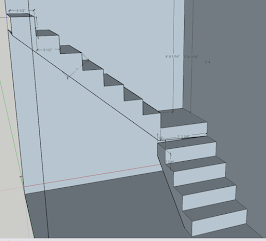
The steps were built with all treated lumber and were drawn out with CAD before building them to make sure the stringers were cut right. We opted to cut our own stringers to make a custom rise and run. The step treads are made with 2 cuts of thick decking boards. The sides that touch the walls are bolted to the wall with concrete anchors.
08 Electrical
A temporary light was installed and a switch to control it. Wires were run with EMT conduit to the plugs, which are GFCI in case they get wet. Conduit connects to junction boxes in the ceiling.
09 Painting the Floor
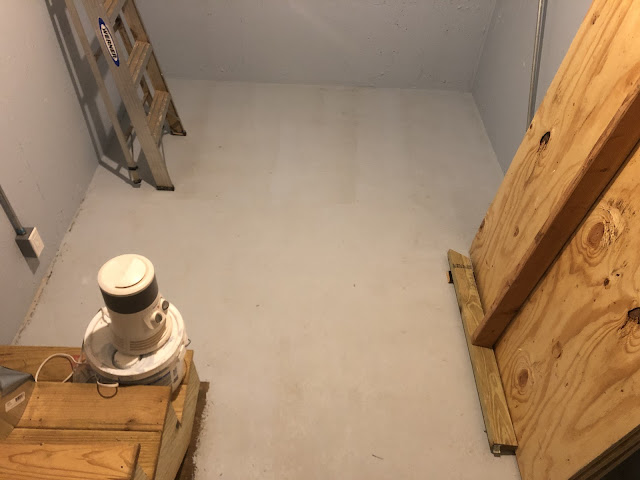
We opted to paint the floor of the storm shelter to reduce moisture in the space. The waterproof paint shown in
part 1 of the series was used on the floor, but grit was added to keep the floor from being slippery. After doing this the space fill so much dryer and it helped lighten it up further. The next step is plywood on the ceiling and a new light fixture. It is great to have a usable shelter with storm season already started in our area.
10 Installed Plywood
To reduce the chance of something coming through the floor above, during a tornado, plywood was used on the ceiling. It is 3/4 AC grade plywood to give it great strength. It is installed with 1 1/2" screws every 8 inches, and with the floor joist being 12" on center this will stop most debris from penetrating the ceiling. We also install a 6-inch exhaust fan in the corner of the room, that is controlled by a thermostat to run when the temperature is outside of the desired range. This fan vents into the closet above and there is a second vent on the other end of the basement that is the air intake vent. These vents help keep the space ventilated and drier.
Exhaust Fan and Vent
Intake Vent in Hatch
11 Installed Trim and Caulked
Leftover pieces of plywood were ripped down to fill the gaps along the exterior edges of the ceiling. A 1 1/2" strip was wide enough to fill all the gaps. Paintable latex caulk was used along both edges of the trim to give it an airtight seal. The seams of the plywood were also caulked to seal them. Als o you can see the new light fixture in the picture.
12 Painted
A mold-resistant paint was used to paint the ceiling. We chose white to help brighten up the space more as the light reflects off the ceiling.
Conclusion
If you follow the full standard you would want to add a layer of sheet metal on the ceiling to help strengthen it from debris penetration. Also, If your shelter did not have living space above then you could just cover the decking (step 05) with a rubber membrane or metal roofing to shed water off the top. We opted to leave it off for now. There are lots of steps to a shelter with many difficult tasks, and if I wanted something quicker and easier I would look at
precast inground shelters. We opted to make something custom that was under our addition so we could get to it from inside the house. I hope this helped you!


